Securing applications using Spring Security 6 — Part 2 — Spring Security Defaults
Welcome back to the next article in the series of “Securing applications using Spring Security 6”.
If you haven’t checked out the first article in the series, my recommendation will be to check it out here Securing applications using Spring Security 6 — Part 1.
This article will be heavily focused on the Spring Security Defaults, like what we get out of the box when we first add the Spring Security Dependency to the application.
I would recommend to go along with this article even if you are already familiar with the nitty gritty.
Pre-Requisites
My understanding you are already aware how to setup a spring boot application using the Spring Initializer Tool as well as add required dependencies to it.
Basic Skills required —
- Spring Boot Basics — Spring Data JPA, Building APIs using Spring etc..
- Docker understanding to run a local instance of PostGreSQL for your application.
Here is the initial setup— Initial Project Setup
Project Setup
To enable spring security for the application, we need to add the dependent packages to the build file. I am using Gradle as a package manager but you can choose Maven if you are more comfortable with it.
Below are the packages that are required to be added to your build.gradle file.
//Depdencies to be added.
implementation 'org.springframework.boot:spring-boot-starter-security'
testImplementation 'org.springframework.security:spring-security-test'
If you are using the project setup that I provided above, these dependencies are already added to the project.
As soon as you run the project, in your console logs you will see the an autogenerated password.

Spring Security Defaults
Spring Security comes with a default configuration that automatically is enabled for your applications unless it is told not to do so.
By Default all endpoints are secured by spring security once it is enabled.
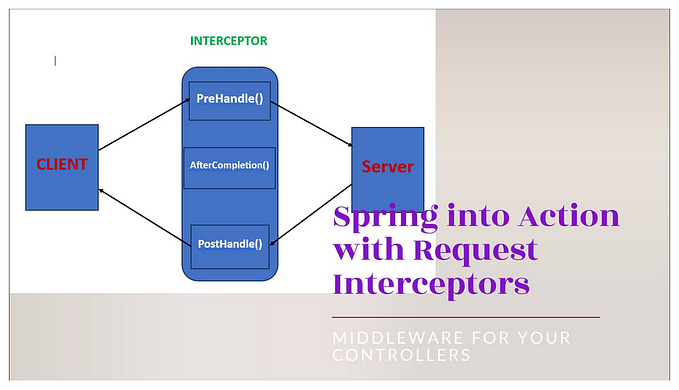
I mentioned in my previous article, one of the core component of spring security is SecurityFilterChain. Spring security provides a default implementation of the security filter that is added to the application once it is enabled.
The default web security configuration is available in SpringBootWebSecurityConfiguration.java
@Bean
SecurityFilterChain defaultSecurityFilterChain(HttpSecurity http) throws Exception {
   http.authorizeHttpRequests((requests) -> requests.anyRequest().authenticated());
   http.formLogin(withDefaults());
   http.httpBasic(withDefaults());
   return http.build();
  }
We will be overriding this method later in this article to provide custom configurations for our application but for now lets understand what default configurations are applied.
- The method ingests an argument of type HttpSecurity which allows configuring web based security for specific http requests.
- http.authorizeHttpRequests() — add URL based authentication using the AuthorizationManager
- http.formLogin() — enables the user to login using the username and password. Activates the UsernamePasswordAuthenticationFilter.
- http.httpBasic() — enables the user to access the APIs via basic authentication. Activates the BasicAuthenticationFilter.
Lets define a a User Controller that exposes a GET API which returns just a simple Welcome Message — user.UserController.java
@RestController
@RequestMapping("/api/user")
public class UserController {

    @GetMapping("/welcome")
    public ResponseEntity<Object> welcomeMessage(){
        Map<String,String> map = new HashMap<>();
        map.put("message","Welcome to spring security demo");
        return new ResponseEntity<>(map,
                HttpStatus.OK);
    }
}
Run your application and fire up a web browser to access the API. http://localhost:<port>/api/users/welcome.
On a successful run, there is a default user and password that is generated which is stored in the security context.
- Default User — user
- Password — Autogenerated Password
Password if re-generated every time the application restarts — Only Applicable for Spring Security Defaults
We can fixate the user and password by adding this information to the application.yml.
    security:
    user:
      name: user
      password: <Password Of your choice>
When the request is intercepted by the Security Filter that is introduced because of the enablement of the Spring Security in the application, it will redirect the user to a web page to Login. This Login Component is pre-built and available as a part of the Default Configuration from Spring Security Framework.
As per the default security filter, HTTP Form Login is by enabled.
Type in the username and password, press SignIn.

Same behavior can be replicated using A REST Client such as POSTMAN and using the Basic Authentication to access the resource.

Session Management
- Spring security enables the Session Management for the application by default.
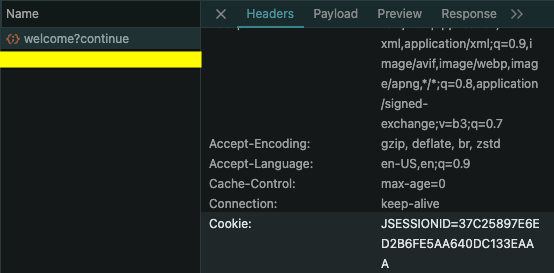
- On a successful login, it drops a cookie on the web browser to maintain a session for the user. It is denoted via JSESSIONID
- The session ID when intercepted and recognized by the FilterChain, on a successful verification, will allow the principal to access the resource without re-authentication.
- REST Client Access needs to inject this information via headers to make the FilterChain aware of the session information.
Logout
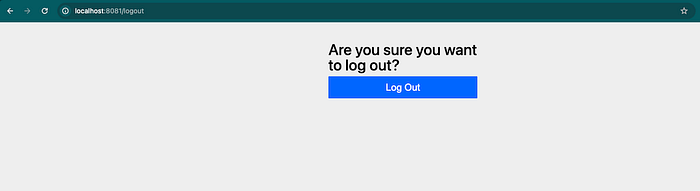
Yes, there is a logout page that is enabled by default similar to Login.
- You can access the page by modifying the URL in your browser address bar — <YOUR_APPLICATION_URL>/logout
- It should look something like — http://localhost:8081/logout
CSRF — Cross Site Request Forgery
This is another important term to understand.
Cross-Site Request Forgery (CSRF) is an attack that forces an end user to execute unwanted actions on a web application in which they’re currently authenticated.
Spring security expects the requests to access the resources for a given username and password, from a single source, hence it enables the CSRF using CSRFConfigurer by default for the application to protect against the Cross Site Attacks.
Important point to remember is, if you are performing an operation to read the information i.e. a GET request, if being authenticated, the application would allow the principal to retrieve the information.
The application will complain for the operations that are going to modify or create a new resource i.e. POST, PUT, DELETE, PATCH etc.
You can disable the support for CSRF by altering the default configuration which we are going to see a little later.
Rule of Thumb — Always attach the X-CSRF-Token as a header if CSRF support is enabled for your application.
Logout Page with CSRF information
- Navigate to the Logout page
- Open up the developer console in the browser.
- Expand the element with class content, there is an input field with the name as _csrf which contains the value for the CSRF token being used.

Accessing CSRF Token in your Application
You can also access this information within your application using the HttpServletRequest Object that contains the information associated to the request being served by the application.
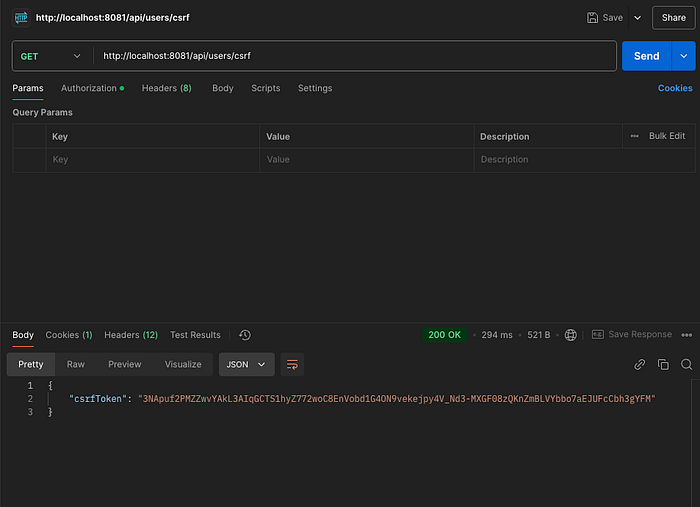
In my application, I exposed it via the API to get this information to the REST Client.
@GetMapping("/csrf")
    public ResponseEntity<Object> getCSRFToken(HttpServletRequest request){
        Map<String,String> map = new HashMap<>();
        CsrfToken csrfToken =  (CsrfToken) request.getAttribute("_csrf");
        map.put("csrfToken",csrfToken.getToken());
        return new ResponseEntity<>(map, HttpStatus.OK);
    }
Disable Spring Security AutoConfiguration
There could be strong reasons when you are adding spring security to your existing application, there are conflicts.
You can disable Spring Security AutoConfiguration either via your Application Code or via your application.yml configuration file.
// Your main file.
@SpringBootApplication(exclude = { SecurityAutoConfiguration.class })
OR
spring:
       autoconfigure:
         exclude: org.springframework.boot.autoconfigure.security.servlet.SecurityAutoConfiguration
We have covered a great amount of knowledge regarding the Default Configurations for Spring Security. This will allow us to move to our next step to modify the default configurations and apply our custom rules on top of it.
Final Code for the work that I demonstrated is available at — https://github.com/cmgabriel/spring-security-demo/tree/ft-spring-security-defaults
It was important to understand these concepts without which it will be pretty complex to apply the customization which we need for our application.
We will start modifying the default configurations and build up a registration and login module for the user in the next part of this series.
Please comment or provide feedback if you really liked this article.
Thank you for your time! Cheers and Happy Learning!!